Showing posts with label baking. Show all posts

Monday, 30 November 2015

November In Photos.


Psssttt...Winter has arrived friends. November is a funny old month; when leaves finally fall after hanging on seemingly impossibly for weeks, that darker, colder morning is hard to adjust to and the days seem to be swept away. I'm sure I probably haven't actually done that much during the month but it seems to fleet by nonetheless. My favourite photo of the month (which lets face it- all are Instagram snaps) is celebrating my seven year anniversary with this bundle of winter beard above. 


  • My best friend was in an actual magazine for FOUR pages. It was the most brilliant of articles and you should check out her handmade knitwear winter discount here


  • I ran around with the messiest hair pretty much all month. And wore the same scarf almost every single day.


  • Local art in my local town. I walk past this all the time and never stop to look. It's quite great really!


  • Dared to get the smallest pinch of festivities rolling in the house by buying this pretty little poinsettia for a whole pound at Lidl!


  • Spent a Sunday sat up at the bar like a proper lad and put the world to right with a lovely friend.


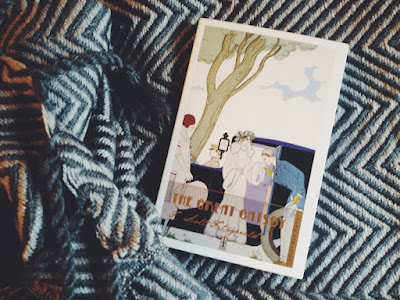
  • Started The Great Gatsby. It's all very grand! And invested in a snuggly wooly blanket that totally had to be bought being reduced from £59 to £17!! 


  • Had one pretty stripes and snazzy sunrise! Look at that palm tree making St Austell look all fancy. You ain't fooling St Austell.


  • And had a bitterly cold morning that was only made slightly better by this view over Truro .


  • Baked for the first time in actual months. I wanted to get a little practice bake in before starting the festive treats and this banana, honey and blueberry loaf got pretty good reviews! 


  • And finally, spent some time being an utter weirdo with this creature. 


I'm desperate to find some new and exciting people to stalk in this darker days, send me all the links to all the people! 

Love Sophie Xx


Sunday, 16 August 2015

Three Ingredient Chocolate Whirls.


I know what you're thinking...'Put those in my face right now."...Well you're on a computer, you cannot do that, what you can do however, is whack the oven on pretty hot (that sounded a bit too Jamie Oliver for my liking) and spend literally about five minutes to make these all for yourself. 

You're Gonna Need:


  • Butter- Just a good couple of chunks- this is lazy baking remember.
  • Pre-made puff pastry- we're not bothering to make our own here guys.
  • Nutella *or other named chocolate spreads*- We're not on a diet here by the way.

Let's Do This:

  1. Melt that butter! You can pop it in the microwave for about 30 seconds or you can melt it on the hob, whatever's laziest for you!
  2. Paint that butter all over your rolled out pastry (it should already come in a sheet-if not roll it to about an inch thick)
  3. (You can add a fourth ingredient here and sprinkle some sugar for extra goodness if you want)
  4. Melt that Nutella! See above methods...
  5. Spread that Nutella to one's taste.
  6. Roll that sugary delight like a sausage and using a sharp knife, cut into chunks.
  7. Lay in a well greased baking dish and paint a little more butter over the top for good luck.
  8. Pop in the oven for 20-25 minutes until golden brown and filling your house with the scent of joy.
These whirls of happiness actually became Harp's birthday cake he enjoyed them so much, this was the best news to me who didn't have to slave over the oven making the most complicated chocolate cake that he usually wants. 

Let me know if you make them!

Love Sophie Xx

Saturday, 28 February 2015

The Days That Make Winter Pass.


There's been a bit of a theme I've picked up on over the last few weeks. We're all a bit tired of winter; cozying up under blankets, embracing the rare natural light coming into our days, counting the seconds down until spring. Something that's keeping us going is the slower days. They're the ones that are made for warm drinks, baking delicious goodies and nesting the home.

Batman's fur is as full as it gets, he waddles around the house like a coal dusted cloud. It's almost time for a good malt and a nail trim ready for summer.

I spend most of my days off in a cozying ritual of preparing the bed in the softest, cleanest cotton sheets I can find, baking doughnuts for the second time (and it going much better!) And practicing my good housewife skills with hearty stews in the slow cooker.

On that note; is anyone keen to swap their slow cooker? Mine is made to feed 4-6 and is really all a bit too big? I'm looking to downsize?


So lets keep our heads high and know that summer will soon be here, we'll all be whooping with cheer and then it's the countdown to Christmas all over again! How brilliant!

What's keeping you all going through these colder days?
Love Sophie XX

Wednesday, 17 December 2014

Festive Planning: Greedy Fat Piggy Chocolate Cake Recipe.


Feeds: 8-10 
Time to make: 45 mins
Time to bake: 35 mins

Ingredients: 

For Cake: 140g plain chocolate, 100ml milk, 2tbsp cocoa powder, 140g unsalted butter (extra for greasing), 140g light muscovado sugar, 3 eggs separated, 4tbsp of soured cream/creme fraiche, 200g plain flour, 1tsp bicarb soda.


For Icing: 140g plain chocolate, 40g cocoa powder, 4tbsp soured cream/creme fraiche, 1tbsp golden syrup, 40g unsalted butter, 4tbsp water, 200g icing sugar.

I would recommend that all chocolate used in this be at least 50% cocoa solids.-It is christmas after all!


1) Preheat oven to 160c/325f/gasmark 3- Grease and line 2 20cm sandwich tins.

2) Break up the chocolate and place with the milk and cocoa powder in a heatproof bowl over a saucepan of hot water. Heat gently, stirring, until melted and smooth. Remove from heat and allow to cool.

3) Meanwhile, in a large bowl- beat together the butter and muscovado sugar until pale and fluffy. Beat in the egg yolks, then add the sour cream/creme fraiche and melted chocolate mixture. Sift in the flour and bicarb, the fold slowly and evenly. 


4) In a separate bowl, whisk the egg whites until stiff enough to hold firm peaks. Fold into the entire mixture lightly. 


5) Divide the mixture between the prepared cake tins and smooth the surfaces. Bake in the oven on the middle shelf for about 35 minutes- until risen and firm to the touch. 


6) Cool in the tins for 10 minutes, then turn on a wire rack to cool completely. 


7) Whilst cooling, you can get the frosting ready (and start on that mountain of washing up) by placing the chocolate, cocoa powder, soured cream/creme fraiche, golden syrup, butter and water into a saucepan and heat gently until melted. 


8) Remove from the heat and sift in the icing sugar, stirring until smooth and glossy. Leave to cool, stirring occasionally until it thickens and holds its shape ala festive chocolate mountain. 


9) Split the cakes in half horizontally with a sharp knife until you have 4 even layers (make sure your cake is completely cooled). Sandwich the layers together with about a third of the icing. Spread the remainder over the top of your fancy cake and if you like, around the sides. 


10) Dust with icing sugar for that festive feeling and pop on a pretty plate! Dig in!

Love Sophie Xx

Tuesday, 16 December 2014

Festive Planning: The Most Delicious Mince Pie Recipe...


Feeds:
The recipe says 20 but I made 12 LARGE ones.
Takes to Make:
45 minutes.
Takes to Bake:
20 minutes. 200c/400f/GM6.
You'll Need:
For the pastry
350g (12oz) plain flour
225g (8oz) butter, chilled and cut into cubes, plus more for greasing the tin
100g (3½oz) icing-sugar
finely grated zest of ½ orange
1 tbsp double cream (you may need a drop more) 
For the filling
75g (2¾oz) fresh cranberries (I chucked a couple of blueberries in there too!)
1 tbsp orange juice
275g (9¾oz) good-quality mincemeat
finely grated zest of ½ orange
1 tbsp whisky
2 tbsp soft light-brown sugar (you may use less)

1) Make the pastry a little while ahead to give it a chance to rest. Preheat the oven. Mix the flour and cubes of butter until breadcrumby, add the icing sugar and the zest and with COLD hands begin to form a ball. Add the cream a little at a time and be careful not to overwork the dough.
2) Take the dough out and carefully work into a flat disc, cover with clingfilm and leave to chill.
3) Meanwhile, cook the cranberries, orange juice, 1tsp brown sugar, the whisky, and zest on a medium heat until the cranberries soften. Help them along by crushing them with the back of a spoon. Keep cooking until the liquid thickens and turn up onto a high heat for the last couple of minutes, cooking off most of the liquid.
4) Add to the mincemeat and add sugar to taste. Pop it all in the fridge until ready to use.
5) Butter your pan well (or use two pans!) and take the pastry out of the fridge. Allow to soften, but remember not to let it get warm! 
6) Roll out the pastry on a lightly floured surface to the thickness of a pound coin (mine were a little thicker!) Cut out 12-20 circles slightly larger than your tin, gently press the circles into the holes, making sure there aren't any gaps!


7) Fill up your little pies about 3/4 way with your mincemeat/fruity filling and cut out 12-20 stars that are about the same size (if not a little larger) than your circles were.
8) Using one small egg, give the little treats a wash and pop in the oven for about 20 minutes- Keep an eye on the though, they'll pretty quickly go from delicious golden brown to dirt colour...
9) Remove everything from the oven and leave to cool for a few minutes (not too long though!) Using a knife, carefully prise them out of their tins, give them a magical dust with icing sugar and leave to cool fully.
10) Once no longer burning temperature, pour on a little cream, snuggle down and enjoy.


Love Sophie Xx

Monday, 8 December 2014

Festive Planning: Swooning Over Cookie Cutters.


Starting the search for the perfect accompaniments to my handmade and homemade Christmas, I stumbled across the Lakeland website. Two hours later and I'm stuck in an impossible conundrum of 'what festive cookie cutters to buy?' 

  • Christmas Tree Cookie Cutter £3.99- I love the way these have been used to make the 3d tree, and sitting in chocolate cupcakes makes these almost irresistible.
  • Snowflake Cookie Cutter Set £9.99- I haven't found such intricate snowflake cutters anywhere else, for four designs, this is a bit of a bargain really.
  • Piñata Cookie Cutter Set £4.99- These are traditionally piñata or donkeys but for a festive twist, simply add some antlers and you've got yourself a surprise filled reindeer! (For the record- these are the ones I'm most swooning over!)
  • Mason Cash Petit Beurre Advent Biscuit Set £19.99-  A beautiful set of 24 numbered advent delights, I'd never be able to bake enough for all my friends and family (as planned) but it'd be nice to make these for the home- not sure they'd last long enough though!
Just so you know, I haven't been approached by Lakeland, I'm just really in love with all of these!

Love Sophie Xx


Wednesday, 3 December 2014

Festive Planning: A Delicious Banoffe Cake.


As you may or may not be aware, this Christmas I have decided to mainly (I use that word loosely- I got excited) to make all of my gifts for friends and family. It isn't just because of our dramatic wedding saving but also it's just nice to get something that someone you care about took the time to make, right?  So I sent around a menu of baking delights to choose from (you can see my options here!) and throughout December (and replacing my Wednesday Words posts for now!) I'll be sharing with you all some of the delicious recipes so we can all have a go!

I'd never made banoffee cake but the trial bake that's shown above was so highly received by my colleagues that I know there's a few that've been waiting a couple of weeks for the recipe. As far as a group of cake eaters go, this lot know their stuff. High praise indeed!

Feeds: 10 (or a couple less if you count sneaky mid afternoon seconds!)
Prep Time: 30 mins total
 Bake Time: 25-30 mins

Ingredients:
175g/6oz self raising flour, 1tsp baking powder, 175g softened butter, 175g golden caster sugar, 3 eggs, 4* medium ripe bananas (the riper the better!) *2 bananas are for the filling, 200ml fresh double cream, 50g icing sugar, 1 jar of Lidl Deluxe range toffee spread (I plan to make my own for Christmas- I'll share that with you at the time!)


1) Preheat the oven to 180c/350f/GM 4 and grease/line two 20cm/8inch sandwich tins.

2) Sift the flour and baking powder into a bowl and add the softened butter, sugar and eggs, mix together until smooth.

3) Mash two bananas in a bowl using a fork until all large lumps have been mushed. Add this to the mixture and mix together for a further minute. (The mixture will no longer be smooth- this is fine!)

4) Divide the mixture evenly between the two tins and smooth the surfaces.

5) Bake in the preheated oven for 25-30 mins until golden brown (it will be slightly darker than usual) and it passes the skewer test. The cakes should feel springy to touch.

6) Leave to cool in the tins for 5 mins and then gently remove. Leave to cool completely before unwrapping from the greaseproof paper.

7) Once cooled, spread a generous layer of the toffee spread onto one of the cakes. Chop the other two bananas and cover the spread. Whilst leaving this to set, add the icing sugar to the double cream and whip on a high speed until thickened. 

8) Spread 1/3 of the cream over the other cake and sandwich together, carefully as the cream vs bananas can be a little slippery.

9) Spread the remainder of the cream over the top of the cake and heat a little of the toffee sauce. Once slightly melted, using your trusty cake skewer, create toffee patterns on top of your cake, adding a lovely finish and extra toffee flavour.

10) Sit down with a nice slice and a cup of tea and watch a festive film.


Love Sophie Xx

Monday, 1 December 2014

A Festive Invitation.


Dear friends and family, 

Happy December 1st! This year, as you know, we're trying to have a pretty budgeted Christmas, saving for a wedding is tough work! I wanted to invite you all to pick a delicious cake that you'd like to receive this year, just please let me know as soon as possible what you'd like!


Banoffeelicious Cake.
Sophie & Harp's Christmas Fruit Cake (With or without drunk fruit).
Greedy Fat Piggy Chocolate Cake.
Rudolph's Lost His Nose Cherry Cake.


I can't wait to spend another festive season with you all! 
Love Sophie Xx

*Blogging friends, I'll certainly try to make a few for you guys too- let me know below what you'd like and I'll see what I can do!

Tuesday, 28 October 2014

A Recipe for Doughnuts.


It's pretty rare that Harps and I get a day off together. After much disagreement, he achieved his birthday goal of getting a deep fat fryer (I'd refused for years because I don't want to encourage his deep fried fat boy inner child). Secondly, I knew that we'd never use it, and since August I'd been right. So far he'd made exactly one batch of chips. Anyway, the drizzling autumn rain made us decide to have a go at making doughnuts for the first time. But being typical us, we doubled the recipe. Only do this if you want to feel incredibly sick, or are feeding a small party.

Recipe from Paul Hollywood (Harps found it not me, I'd never trust creepy Hollywood!), find it here.


Feeds: 8 (or 5 ring doughnuts, 6 jam doughnuts, one yum yum and one penis looking mess (Harps's not mine.)

Prep Time: 1-2 hours

Cooking Time: 30 mins

Ingredients: 

  • 250g/9oz strong white flour, plus extra for flouring
  • 25g/1oz caster sugar
  • 20g/¾oz unsalted butter, softened
  • 1 free-range egg
  • 7g instant yeast
  • 5g salt
  • 75ml/2½fl oz warm milk
  • sunflower oil, for deep fat frying

    And Bake:

    1. For the doughnuts, place all the ingredients into a large bowl (except the sunflower oil) with three tablespoons of water.
    2. Stir with your hands to make a dough.
    3. Gradually add another another tablespoon of water and massage in the bowl for four minutes.
    4. Tip the dough onto a lightly floured surface and knead well for 10 minutes, or until the dough is smooth and elastic.
    5. Place into a bowl and leave to rise for 40 minutes, covered with a damp tea towel.
    6. Tip the dough out, again onto a very lightly floured surface.
    7. Divide the dough in half.
    8. With a floured rolling pin, roll out the dough quite thinly to about 1cm/½in thick. Cut into rounds using an 8cm/3¼in straight sided round cutter, then use a 2cm/¾in cutter to cut holes out of the middle.
    9. Spin each doughnut on your index finger to expand the hole.
    10. You should be able to cut out about eight doughnuts from this dough. Place all circles onto an oiled baking tray, loosely cover with cling film, not allowing it to touch the top of the doughnuts and leave to rise for 30 minutes.
    11. Preheat a deep fat fryer, filled with sunflower oil to 180C/350F (Caution: hot oil can be dangerous; do not leave unattended.)
    12. Drop each doughnut in separately, cooking each side for about a minute or until golden-brown. Remove with a slotted spoon and place onto a plate lined with kitchen towel to soak up the excess oil.
    13. Leave to cool.
    14. For the icing, gradually add 25ml/1fl oz of cold water to the icing sugar. It will eventually turn into a thick paste. Stir in the lemon zest. Roll sugared doughnuts.
    15. When the whole doughnuts have cooled, brush the tops of the doughnuts with the icing. Sprinkle over a little more lemon zest. Inject Jam into the doughnut balls.
    16. Leave to set on a cooling rack, to cool completely.


Enjoy!
Love Sophie Xx

Wednesday, 10 September 2014

Weird & Wonderful News Wednesday #25 Marvellous Mango Muffins.


You're thinking:
1) Those aren't muffins?
2) They've got decking blueberries in! They're not even mango!
3) This isn't news! You said last week that the news posts had returned?...Fucker.

I am guilty of all three charges! And there is a simple reason for all of this. I had too many eggs going out of date. True story. Don't worry people that I have been bounding around Cornwall gifting these to today, they haven't actually gone out of date. They're just pretty close. So I decided to make some blueberry muffins for work (I've been a bit stressified the last couple o'days-I'll explain tomorrow.) THEN, I got all a bit bakey and decided that I wanted to also make some cakes for myself and Harps and was feeling all a bit experimentos (making up a lot of words today aren't I?) that I 'dabbed a hand' (weird saying) at making some mango cupcakes! ( I called them muffins in the title to demonstrate a little alliteration-so shoot me)

Anywhooty, due to flummoxing around the county, I seem to have gifted most of my little blueberry gems, much to Harps's dismay, which means that my lovely colleagues had better like experimental mango cakes! If they don't, they're all mango hating fools. It also means that I just haven't had the time to accumulate all the strange things I've been reading about this week- sozages for that.

And I sang this over and over and OVER again whilst I baked. I urge you to do the same whilst you read the recipe below! 


WHO LIKE THE MANGO? 


And the most boring photo whilst baking award goes to...


Bake Time: 17 minutes.
Prep Time: 10 minutes
Serves: Some work colleagues and a greedy Harps. (12)
Mango Factor: Priceless.

Ingredients: 115g Self Raising Flour, 115g Caster Sugar, 115g Melted Butter/Marg, 1tsp Vanilla Essence, 2 Free Range Eggs, Mangoey Goodness ( I used mango juice but in hindsight it wasn't a great move).

Icing: Not as much Double Cream as I used (I'd say you need about 100ml?) P.s. Anyone want some mango cream icing? Mango juice (bad idea-my mango cakes are wavering already) and Icing Sugar.


1) Preheat the oven to 190c/ 375f/ Gas 5- Line a 12 hole cupcake pan with standard sized cases.

2) In a mixing bowl, beat together the melted butter/marg with the sugar until a pale and creamy, light texture forms.

3) Gradually whisk in the eggs and the mango juice (about 75ml), then sift the flour on top. Using a large metal spoon, carefully fold the flour into the batter.

4) Spoon evenly into the cases and bake for 16-18 minutes on the middle shelf, until lightly golden and firm. Transfer to a wire rack to cool.

5) Pour the double cream into a bowl and sift in some icing sugar. Whip the mixture, adding a little mango juice at a time. Set aside in the fridge until your cakes have cooled fully. 

6) Ice those bad boys up and you're in mango heaven!

Love Sophie Xx


Monday, 25 August 2014

Scrumptious Blueberry, Raspberry & Chocolate Muffins.


Happy Bank Holiday Monday one and all! Has anybody had any lovely plans?! I've been busy baking some delicious muffins in a last ditch attempt to hold on to summer- alas, the weather doesn't agree with me on that one *sigh*.  I have been coming to terms with the impending "Winter is coming John Snow" after plenty of customers, irritatingly kindly kept informing me last week:


1) It is 18 Fridays until Christmas.

2) There are only three more paydays until Christmas.


Fuckers.


So in the middle of the night (when all the best thinking gets thinked.) I came up with the plan that this year everyone will be receiving only homemade gifts from me. Mainly because I really need to get this saving malarkey underway, but also because this year I've rediscovered my love for baking, for homemade gifts and personalised touches. Today I ventured into the rain and bought some edible, festive glitters and a spanky, new miniature cake tin. I am on it! These muffins are super simple to make and super delicious, perfect for this evenings bank holiday snuggliness.  

Makes 9-12
Ingredients: 225g Plain Flour, 2 tsp Baking Powder, 115g Caster Sugar, 175g Fresh Fruits/chocolate drops (I wanted to make 3 different types of muffin but realised I didn't have enough butter), 1 Egg- Beaten, 115g Butter/Marg- Melted, 150ml Whole Milk, 1 tsp Vanilla Extract. 


1) Line a 9-12 hole muffin pan with large paper cases . Preheat the oven to 190c/375f/ Gas 5.

2) Sift the flour and baking powder into a bowl.

3) Stir in the sugar and fruits/chocolates (coating these in flour will help stop them from sinking.)

4) Make a well in the centre.

5) In a measuring jug, mix together the egg, melted butter/marg, milk and vanilla extract.

6) Pour into the well and mix lightly using a spoon, forming a thick, rough batter.

4) Spoon into muffin cases and bake for 23-25 minutes on a middle shelf until golden brown and risen.

5) Transfer onto a wire rack to cool a little. 

6) Have a nibble whilst still warm.


Love Sophie Xx

Wednesday, 13 August 2014

Weird and Wonderful News Wednesday #22 The Chocolate Cake To End All Chocolate Cakes.


Good Wednesday lovely world! I am now officially back at work, and the lovely little mini break, is just a distant memory already. Haha, I kid (sort of). Still on my news hiatus (my life is much more interesting), I thought I'd share with you the recipe for the four layer chocolate devils food cake (or I like to think of it as the cake from Matilda) that I made for Harp's birthday. Warning: It's not a quick one. Pretty damn delicious if I do say so myself though...

Serves 8-10 or two greedy people over a few days.
Ingredients: (I would recommend that all chocolate used in this be at least 50% cocoa solids.)

For Cake: 140g plain chocolate, 100ml milk, 2tbsp cocoa powder, 140g unsalted butter (extra for greasing), 140g light muscovado sugar, 3 eggs separated, 4tbsp of soured cream/creme fraiche, 200g plain flour, 1tsp bicarb soda.


For Icing: 140g plain chocolate, 40g cocoa powder, 4tbsp soured cream/creme fraiche, 1tbsp golden syrup, 40g unsalted butter, 4tbsp water, 200g icing sugar.

1) Preheat oven to 160c/325f/gasmark 3- Grease and line 2 20cm sandwich tins.

2) Break up the chocolate and place with the milk and cocoa powder in a heatproof bowl over a saucepan of hot water. Heat gently, stirring, until melted and smooth. Remove from heat and allow to cool.

3) Meanwhile, in a large bowl- beat together the butter and muscovado sugar until pale and fluffy. Beat in the egg yolks, then add the sour cream/creme fraiche and melted chocolate mixture. Sift in the flour and bicarb, the fold slowly and evenly. 

4) In a separate bowl, whisk the egg whites until stiff enough to hold firm peaks. Fold into the entire mixture lightly. 

5) Divide the mixture between the prepared cake tins and smooth the surfaces. Bake in the oven on the middle shelf for about 35 minutes- until risen and firm to the touch. 

6) Cool in the tins for 10 minutes, then turn on a wire rack to cool completely. 

7) Whilst cooling, you can get the frosting ready (and start on that mountain of washing up) by placing the chocolate, cocoa powder, soured cream/creme fraiche, golden syrup, butter and water into a saucepan and heat gently until melted. 

8) Remove from the heat and sift in the icing sugar, stirring until smooth and glossy. Leave to cool, stirring occasionally until it thickens and holds its shape ala Great British Bake Off (seriously how exciting is it that it's back?! Totally the inspiration for this icing.)

9) Split the cakes in half horizontally with a sharp knife until you have 4 even layers (make sure your cake is completely cooled). Sandwich the layers together with about a third of the icing. Spread the remainder over the top of your fancy cake and if you like, around the sides. 

10) Pop on a pretty plate and voila! 


Love Sophie Xx

Sunday, 22 June 2014

How to Bake a Delicious Honey Cake.


Good first day of summer to all of you! I hope that wherever you are, you're enjoying sunshine, the smell of BBQ's and that you're not too burnt because you didn't use suncream! Today I thought I'd drop by with a delicious recipe that a wonderful woman from the National Federation of Women's Institutes gave me when I was visiting the bee tent at Royal Cornwall Show just the other week! I'd been excited to try it, so when I discovered that it was my baking week (we have a longstanding Great Banking Bake-Off Wednesday in my work) I knew I wanted to try this. I was lucky to get some super delicious Cornish wildflower honey and I made sure I got some local feee range eggs to help our friends, the hens.  I'm a bit of a sprucer, so  I spent ages bumbling around on Pinterest for inspiration as to what to add to my delicious cake; until Harps told me to stop faffing and just make it plain. (I still snuck a few raisins in though.) I've got to say, it was one of the easiest cakes I've ever made and went down a right treat! Perfect for summer days ahead! 


200g SR Flour
2 Eggs, large
125g Butter
150g Honey, clear
100g Soft Brown Sugar
1 tbsp Water
Optional – 1 tsp Mixed Spice or a few Flaked Almonds or raisins 


1. Set oven Gas 5 175C
2. Grease and line a tin 28cm x 18cm
3. Put the sugar, butter and honey in a large pan and melt together
4. Allow to cool
5. Beat in the eggs, water and flour (and spice if used)
6. Mix well
7. Place in the cake tin and sprinkle with flaked almonds if used and bake for about 35 mins until firm


And hey presto! Perfect and long lasting honey cake! I didn't add the almonds or mixed spice, mainly because it was too sunny and I didn't want to go and source these things. I'm sure it'd be delicious with them!


Love Sophie Xx